Improve your form and strengthen your wrists to take the pain out of pushups.
There’s a reason why you probably did your first pushup during elementary school gym class: It’s an essential bodyweight exercise that strengthens the upper body and can be done anywhere without any equipment.
But your body has changed a lot since grade school. Whether you’re new to strength training, coming back after a break, or just dealing with limited mobility due to a sedentary lifestyle, that simple exercise probably feels a lot more challenging now. Wrist pain during pushups is one common limiting factor that makes performing the move uncomfortable, and even impossible, for many.
“Don’t get too discouraged or write off pushups as an exercise because of that one specific issue,” says Tonal coach and certified personal trainer Tim Landicho. “There is more than likely some version of a pushup that you can do. Even if it’s not the ‘standard’ pushup, there are many modifications we can play with and tools we have at our disposal.”
Here, Landicho breaks down the causes of wrist pain during pushups, how you can eliminate the ache for pain-free pushups, and the best modifications to do in the process.
What Causes Wrist Pain During Pushups?
If your wrists are hurting during pushups, it’s likely a result of “overloading the body beyond its current capacity,” says Landicho. He explains that this could happen in three ways: working in a larger range of motion than you’re prepared for, working with too much load (or resistance), or doing too much volume.
You can address limited range of motion and the inability to push enough load by working on strength and mobility in the wrists. As you build up to doing a full pushup, you can try the exercises and modifications below to strengthen your wrists.
If doing a few pushups feels fine, but the wrist pain creeps up in later sets of a workout, you’re likely dealing with a volume issue and may need to gradually increase the number of pushups you can do in a single session. Improving your wrist strength will help you get to the point where you’re cranking out the reps without pain. Here’s how to get started.
1. Check Your Form
Before jumping into specific wrist exercises, it’s important to make sure your pushup form is on point. You might be inadvertently making small form mistakes that are causing pain but are easy to correct.
“Think about how much tension you’re creating on the floor with your hands,” says Landicho. “In a pushup, we want to think of our hands in the same way that we think of our feet in a deadlift or a squat.”
Just as your feet create a strong base of support in those moves, Landicho says you can do the same with your hands in a pushup by planting them firmly on the ground with your weight evenly distributed between your palms and all ten fingers. He recommends spreading your fingers wide to create a wider surface area for more stability. “It’s almost like you’re suctioning the floor to your hand,” he says.
Working your way up from the ground, Landicho suggests focusing on your shoulders next, making sure they’re screwed in toward your body instead of flared out. “That creates external rotation in our shoulder, which creates more stability there,” he says. “When we have more stability from the ground and from the shoulders, it’s going to create a lot more room for the joints to move.”
Finally, check that your hands are placed directly under your shoulders and not any further behind them (toward your feet). In a pushup, your wrists are in extension (versus flexion, in which you’d bring your fingers to the inside of your wrists), and positioning your hands further back only exaggerates the angle of extension, which could cause more pain.

2. Work Your Wrists
Since your hands and wrist are the foundation of your pushup, it makes sense that you’d want them to be strong and mobile. Landicho recommends these exercises to prep your wrists for the load of a full pushup.
Quadruped Rocking Wrist Extension
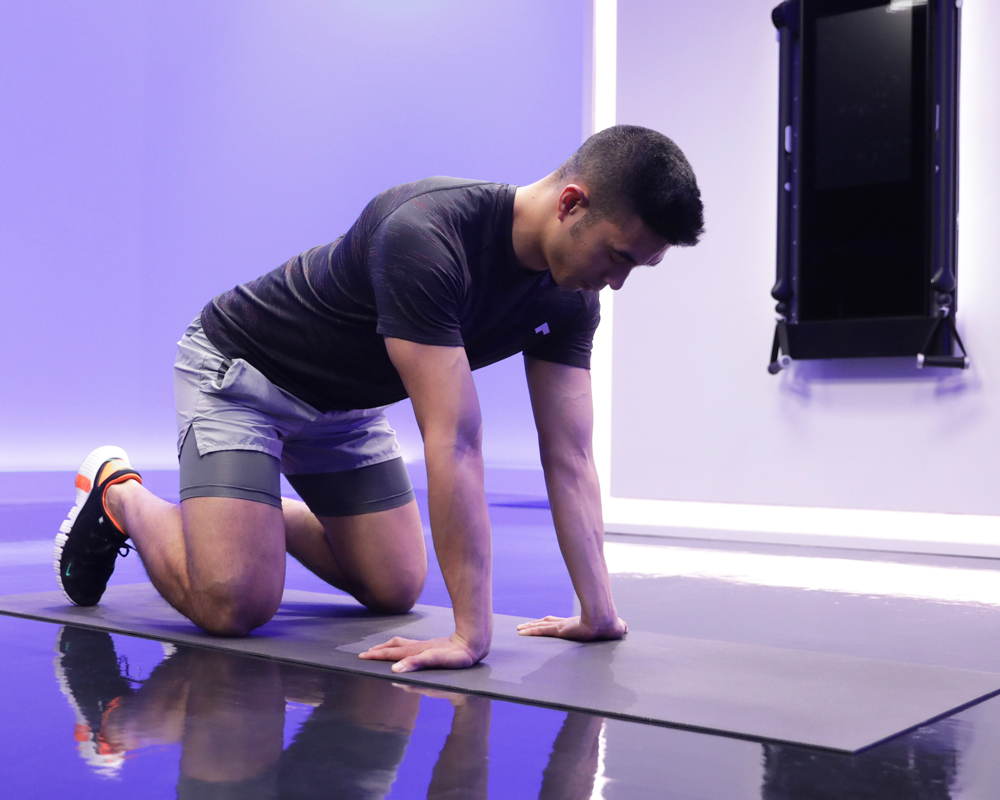
Why it Works: We spend way more time with our wrists in flexion than extension (think typing on a computer or tapping your phone), so it’s not surprising that trying to push our body weight with our wrists in flexion doesn’t feel great. In this position, Landicho says, “the further back you sit, the more intense it gets and the more it mimics that full wrist extension.” If you need to modify, try placing your hands on the bench instead.
How to Do it: Get on your mat on all fours, hands under your shoulders, and knees under your hips. Rotate your hands so your fingers are pointing toward your knees. Gently rock your hips back toward your heels, feeling the stretch in the front of your wrists for a few seconds, then return to the starting position. Gradually increase the amount of time you’re able to spend with your hips rocked back.
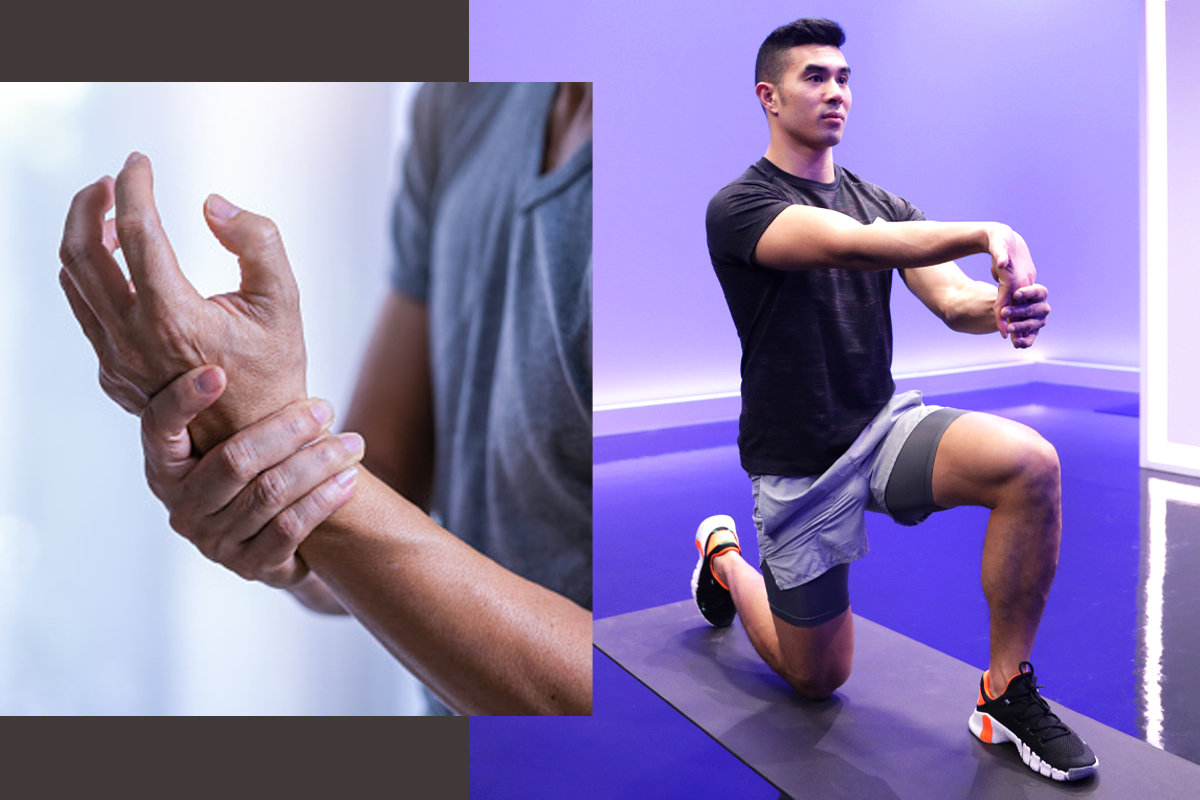
Wrist Extension
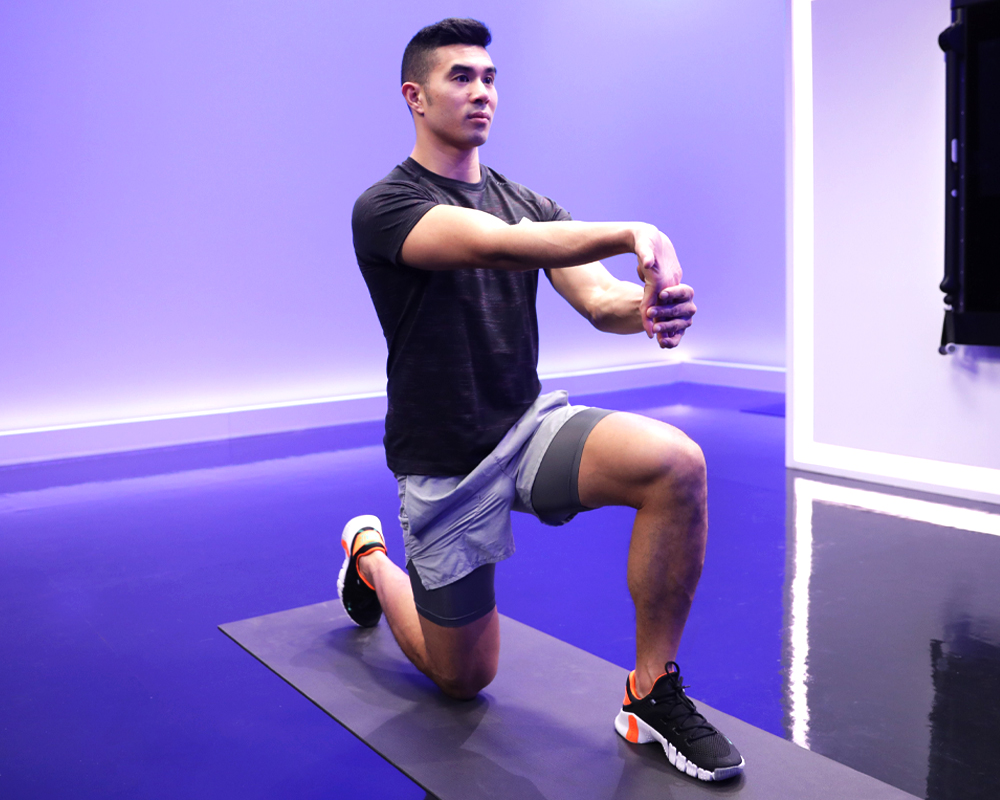
Why it Works: “For people who are at a desk a lot, this is a really simple one,” says Landicho. “It’s going to be less intense because you’re putting less of your body [weight] into it.” If getting down to the ground is too challenging, you can also easily do this move sitting or standing.
How to Do it: Extend your arm straight in front of you with your palm facing up. With your opposite hand, push down on the hand of the extended arm, pushing your fingers toward the floor. You should feel this stretch on the inside of your wrist.
Farmer March

Why it Works: In addition to being an excellent core exercise, the Farmer March also helps strengthen your grip and your wrists. “When you’re forcing your forearm muscles to really stabilize around [the wrist] joint, it’s going to help with creating tension into the floor,” says Landicho. For more of a grip challenge, try deadlifts.
How to Do it: Stand between Tonal’s arms and take a handle in each hand with your arms at your sides. Slowly drive one knee up toward the ceiling, balancing on the opposite leg. Alternate legs.
3. Try These Pushup Modifications
As you work on improving strength and mobility in your wrists, you can still get the benefits of doing pushups with these modifications, which are less stressful on the wrists.
Knuckle (or Handle) Pushup
Why it Works: Landicho recommends this variation if you’re unable to bear any weight on your hands. Both fists and handles keep your wrists in a neutral position which is less demanding than wrist extension.
How to Do it: Perform a standard pushup but instead of placing your hands flat on the ground, make fists and rest on your knuckles or grab a set of pushup handles.
Towel-Elevated Pushup

Why it Works: If you’re able to do a few pushups without pain but can’t get through a full set, you might just need to modify the angle of your wrists on the ground. “The greater that angle is, the more stress is going to be on that joint. It’s not good or bad, but some people aren’t prepared for that yet,” says Landicho. Raising your hand slightly off the ground with a rolled-up towel helps reduce that angle. “It’s soft, so it allows you to press firmly into it without it being uncomfortable but it also decreases the amount of bend in the wrist joint,” he says.
How to Do it: Perform a standard pushup with a rolled-up towel under the heel of your hand. As your wrist extension and mobility gets better over time, Landicho says you can gradually make the roll smaller and smaller until you’re able to do a pushup with your hands flat on the floor.
Incline Pushup

Why it Works: By doing a pushup with your hands on the bench, you’re able to reduce the load on your wrists as well as soften the angle of wrist extension. “That’s a great option for someone who has no pushup experience because we still want to emphasize maintaining a good plank position where your core is tight,” says Landicho. (To check your plank form, try a pillar bridge with Tonal Smart View enabled. Smart View will correct your form if your hips are sagging and not staying level–which you’ll also want to focus on during pushups.)
How to Do it: Place your hands at the edge of the bench slightly wider than the shoulders, with legs extended behind you on the floor. Bend the elbows about 45 degrees from your body as you aim your chest to your fingertips. Once your chest is just above the bench, press through your hands to push back up.
Improve Your Pushup on Tonal
Before jumping into a Tonal program or workout that’s packed with pushups, try one of these sessions to improve your mobility and prep for the move.
Wrist and Forearm Mobility – Coach Jared Rodriguez
This workout is designed to loosen up tight wrists and forearms as well as improve mobility. You’ll practice exercises that’ll help make your pushups less painful and even improve how your wrists and forearms feel in your bench press.
Wrist Clinic – Coach Liz Letchford
In this 11-minute session, you’ll focus on wrist mobility and creating stability in the wrist joint.
Pushup Lab – Coach Liz Letchford
f your shoulders are the weakest link in your pushup, try this workout. You’ll work on building shoulder strength and mobility so you’ll be fully supported once you get into pushup position.
Perform a Pushup – Coach Natalie Carey
If doing even one pushup feels impossible right now, this four-week, beginner-level program will build up all the muscles you need to tackle the move.
The information provided in this article is for educational and informational purposes only. Individuals with pre-existing health conditions, injuries, or concerns should consult with their healthcare provider before trying a new exercise or nutrition regimen.